Warning
You are reading an old version of this documentation. If you want up-to-date information, please have a look at 1.1 .Pick your first parts
Your system is now mounted, calibrated and configured. This section will introduce the TCP Terminal that can be used to test your system and present you the basic production scenario.
TCP Terminal
The TCP Terminal can be accessed from the Resources area on the page.
You can also access it from the HELP page. Click on the and then on .
The following page (Fig. 18) will appear.
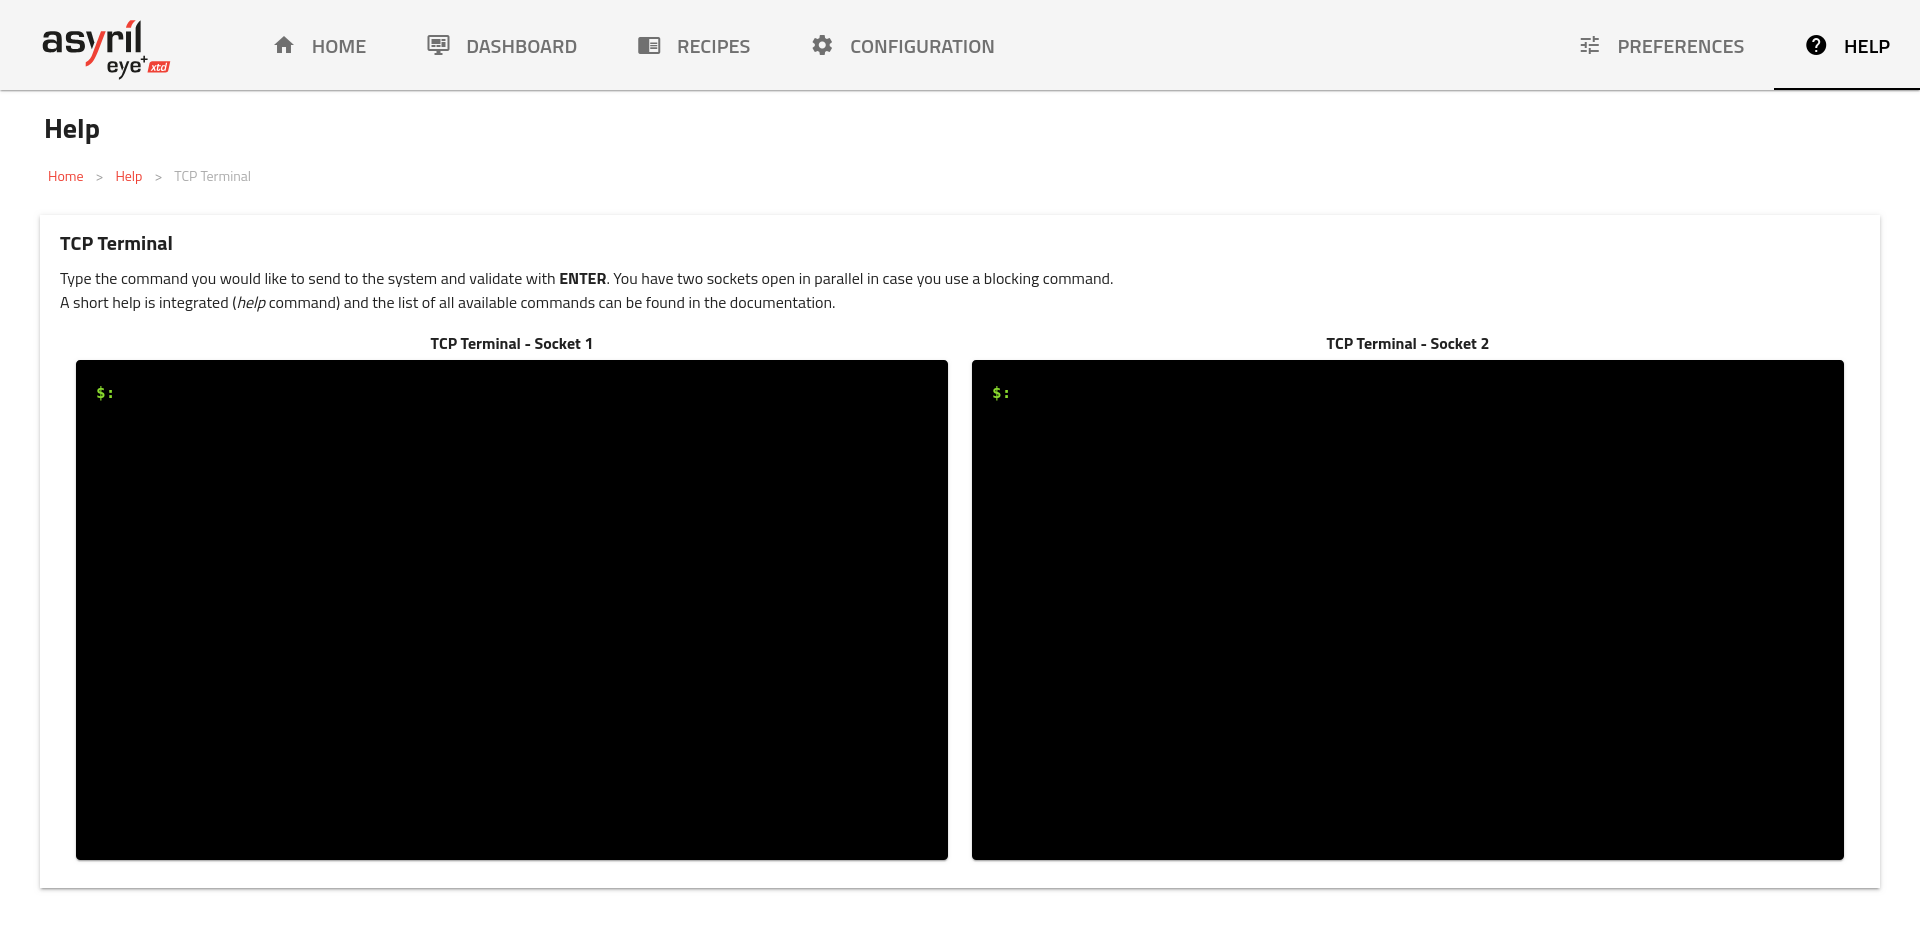
Fig. 18 TCP Terminal
The two terminals communicate with the EYE+ XTD Controller through TCP/IP socket messaging (one socket per terminal).
The EYE+ XTD Controller must be in the ready state. Check the current state by sending the command get_parameter <parameter> (<value>…)
where <parameter> is state. It should answer 200 ready.
Note
If you are in recipe edition, camera configuration, hand-eye calibration, or already in
production state, verify that no other EYE+ XTD Studio pages are open. If other pages are open, ensure all
work is saved and then close them.
Basic production scenario
Fig. 19 shows the basic production scenario.
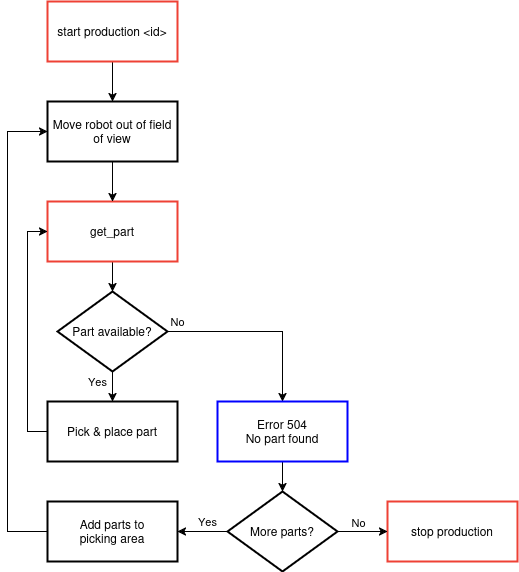
Fig. 19 Basic production scenario
Send the command get_recipe_list to display the list of existing recipes saved in the EYE+ XTD Controller. Your first recipe should appear with its name and identifier.
Start production by sending start production with your recipe identifier (e.g.,
<recipe_id>). This will switch EYE+ XTD into the production state.Ensure the robot is not within the camera’s field of view.
Place at least one part on the picking area and send get_part. You will receive a message similar to
200 x=0.12345 y=6.78910 rz=11.12, where200indicates a positive confirmation, andx,y, andrzare the coordinates of the detected part in the robot frame.Move your robot to the received coordinates and pick the part.
To obtain the next part’s coordinates after picking, simply send get_part again.
Note
If you do not receive the 200 response from any command, consult the error_codes for more
information on the issue and how to troubleshoot it.
Tip
You can return the system to the ready state by sending stop <state> with the state parameter set to
production (e.g., stop production).
Your first pick and place
Now you are ready to implement your first robot/PLC program to communicate with EYE+ XTD.
You can use all the commands described in section commands.
Different production scenarios are described in section Production scenarios.