Warning
You are reading an old version of this documentation. If you want up-to-date information, please have a look at 1.1 .Power supply
Power connection
Connect the Power connector of the EYE+ XTD Controller to the specified power supply (see Table 11) with the provided power cable.
Once it is done, the EYE+ XTD Controller will start automatically. When the system starts up, the Status LED is off. Start-up may take up to 2 minutes. It may take longer when restarting the system after an upgrade (approx. 5 minutes) or if the camera is not connected.
Note
The system will automatically reset after some time (around 30min) if the application does not start properly.
When the system enters the ready state, Status LED blinks slowly (1Hz).
To turn off the EYE+ XTD Controller, unplug the power cable.
Note
The power cable is provided in the EYE+ XTD kit.
Power specifications
Table 11 summarizes the EYE+ XTD Controller power specifications.
Characteristic |
Value |
|---|---|
Voltage |
24V DC PELV (+- 5%) |
Current Power with frontlight |
6.5A max |
Current Power without frontlight |
2.5A max |
Note
Those values may change with the addition of new hardware functionality (e.g. : GPIO)
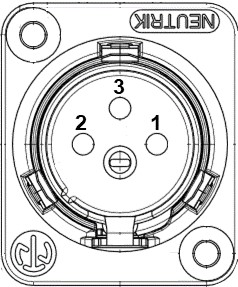
EYE+ XTD connector is a male XLR3. Connector and cable specifications are presented in Table 12 and in Table 13.
Pin |
Signal |
EYE+ XTD Controller connector |
|---|---|---|
1 |
24V DC PELV |
|
2 |
GND |
|
3 |
EARTH |
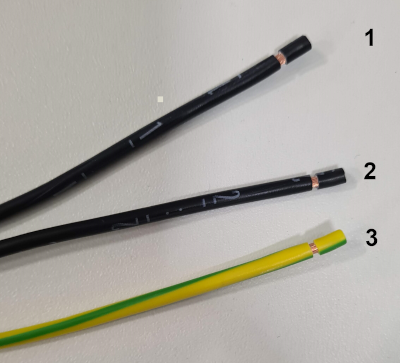
Number |
Signal |
Internal wires |
EYE+ XTD Controller connector |
|---|---|---|---|
1 |
24V DC PELV |
Black, labeled 1 |
|
2 |
GND |
Black, labeled 2 |
|
3 |
EARTH |
Yellow / Green |