Warning
You are reading an old version of this documentation. If you want up-to-date information, please have a look at 1.1 .Connection lost?
If you have lost the connection with the robot, PLC or EYE+ XTD Studio, try to check if they are correctly configured.
Note
If you have lost the connection with the camera, go directly to section Camera connection lost.
To do this, connect directly to the device with an Ethernet cable. Configure your computer to be under the same network as the connected device. Open the terminal and ping the device to the IP address on which it is supposed to be configured.
Tip
Check General Ethernet Settings for the default configuration of the EYE+ XTD Controller Ethernet ports.
If your device is correctly connected, the command answer should look like this:
Pinging 192.168.127.254 with 32 bytes of data:
Reply from 192.168.127.254: bytes=32 time<1ms TTL=128
Reply from 192.168.127.254: bytes=32 time<1ms TTL=128
Reply from 192.168.127.254: bytes=32 time<1ms TTL=128
Reply from 192.168.127.254: bytes=32 time<1ms TTL=128

Ping statistics for 192.168.127.254:
    Packets: Sent = 4, Received = 4, Lost = 0 (0% loss),
Approximate round trip times in milli-seconds:
    Minimum = 0ms, Maximum = 0ms, Average = 0ms
If not, your device is not properly configured or not correctly connected, please refer to the appropriate section below.
Camera connection lost
Since the IP address of the camera cannot be changed, you have probably lost the connection with it. Reboot the camera by unplugging the cable. Wait a few seconds and reconnect the cable. After a moment, check your connection through EYE+ XTD Studio on the page. The status of the camera is directly visible on the first section.
The camera LED should start flashing green. If not, check Connection status of the camera for the corresponding status.
TCP/IP communication connection lost
If you loose the TCP/IP communication connection, check the robot or PLC configuration. You must set the configuration so that it is on the same subnet as the EYE+ XTD Controller port where it is connected. Check the General Ethernet Settings or directly in EYE+ XTD Studio on Communication Configuration.
You can make the necessary changes on the robot, PLC or EYE+ XTD depending on your application and the other connected devices.
EYE+ XTD Studio connection lost
If you lose connection to EYE+ XTD Studio because you do not know the actual communication or config port configuration, you can use the EYE+ XTD Locator to find your EYE+ XTD. Alternatively, you can still access EYE+ XTD Studio using a direct connection via Ext. 1 or Ext. 2 ports.
Important
The Ext. 1 and the Ext. 2 ports are not dedicated to access EYE+ XTD Studio, but it can be used if the communication port is not accessible anymore for any reason. Through this connection you will be able to read or edit the settings of the communication port.
Direct connection through Ext. 1 or Ext. 2 port
Direct connection is a direct Ethernet connection between your computer and EYE+ XTD. To do so, connect the RJ45 port of your computer to the RJ45 port of the EYE+ XTD Ext. 1 or Ext. 2 port using an Ethernet cable. This port has a fixed default IP address (General Ethernet Settings).
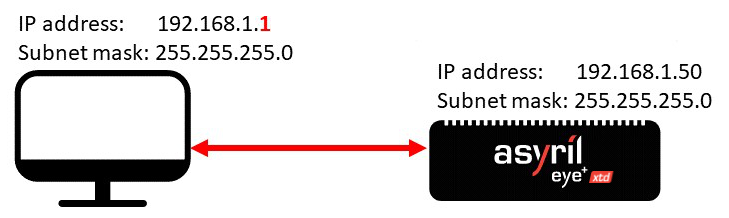
Fig. 248 Direct connection through Ext. 1 or Ext. 2 port
Change the IPv4 configuration of your computer by choosing an IP address and subnet mask so that it is on the same network as the EYE+ XTD Controller. For example, apply the configuration presented in Table 27.
Ethernet port |
IP address |
Subnet mask |
|---|---|---|
Computer RJ45 |
192.168.0.1 |
255.255.255.0 |
Once your computer is properly configured, open your web browser and enter the IP address of the port (e.g. 192.168.0.50). The home page (Fig. 249) should appear.
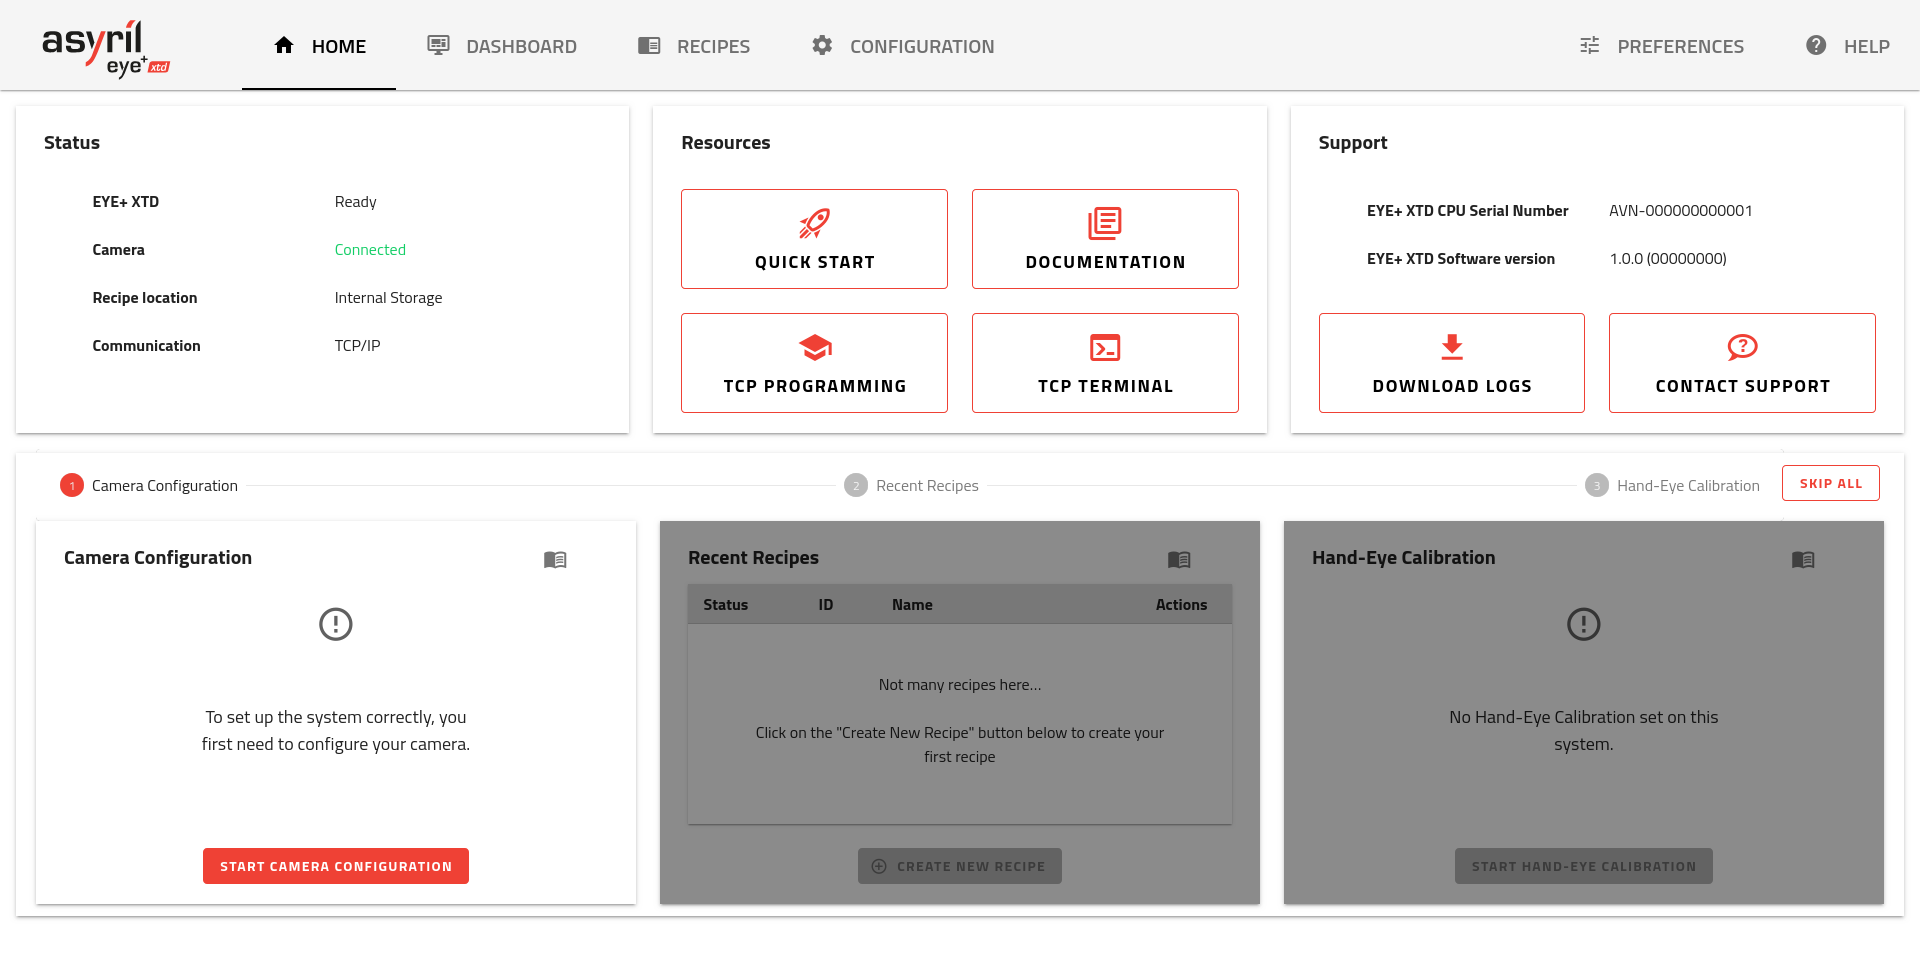
Fig. 249 EYE+ XTD Studio home page with EYE+ XTD in ready state
Go to and click on Communication to access the Communication Configuration. From here, you can read or change the Communication port settings.
Note
If the home page does not have the same display as in Fig. 249, refer to Recommended web browsers and Interface display.