Warning
You are reading an old version of this documentation. If you want up-to-date information, please have a look at 1.1 .Recipe wizard
Standard Recipe
A standard recipe is suitable when all parts are presented in a single, consistent orientation. It will return the coordinates of the detected parts, assuming that they face the same way.
Note
If you need to detect parts in multiple orientations, or even entirely different parts within the picking area, consider creating a Multi-model recipe.
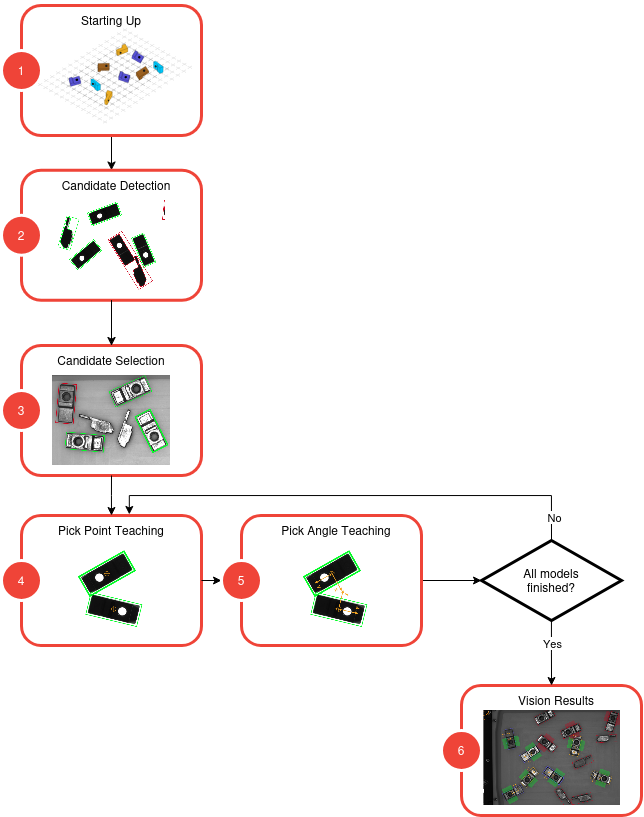
The recipe wizard for a standard recipe consists of the following steps:

1. Starting Up: Images are captured with acquisition parameters that will be used in the next steps.
2. Candidate Detection: Potential pickable parts are detected.
3. Candidate Selection: (Optional) Filter remaining parts in non-desired orientation.
4. Pick Point Teaching: X,Y-Position of the part is precisely defined.
5. Pick Angle Teaching: RZ-Orientation of the part is precisely defined.
6. Vision Results: Gives an overview of the complete vision results.
The name of the recipe can be defined on the top part of the wizard that is accessible from each step.
Note
Name your recipe with a distinctive name. If you do not specify a name, EYE+ XTD will name the recipe My Recipe by default.
Multi-model recipe
You can create a new multi-model recipe with the recipe wizard by clicking on and selecting Multi-model recipe from the selection dialog.
The recipe wizard is designed to create a recipe for your specific parts. It is divided in 6 steps, 3 of which are to be performed once per model.
1. Starting Up: Images are captured with acquisition parameters that will be used in the next steps.
2. Candidate Detection: Potential pickable parts are detected.
3. Candidate Selection: Classify the candidate under the specified model.
4. Pick Point Teaching: X,Y-Position of the part is precisely defined.
5. Pick Angle Teaching: RZ-Orientation of the part is precisely defined.
6. Vision Results: An overview of the results from all previously trained models at once on a single image.
When creating a multi-model recipe, the vision steps follow the same process as for a standard recipe. Specific details and settings for each model are provided in dedicated sections within the documentation for each step.
The name of the recipe can be defined on the top part of the wizard that is accessible from each step.
Note
Name your recipe with a distinctive name. If you do not specify a name, EYE+ XTD will name the recipe My Recipe by default.
Note
You must complete all steps for the current model before moving on to the next. Once a model is complete, you may go back to it at any time using the selector showing the model name as shown below.
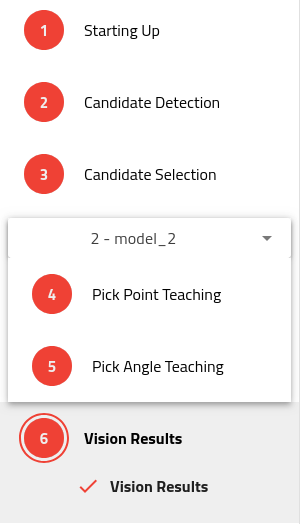
Fig. 52 Multi-model - Side Panel