Warning
You are reading an old version of this documentation. If you want up-to-date information, please have a look at 1.1 .3.1 Acquisition settings
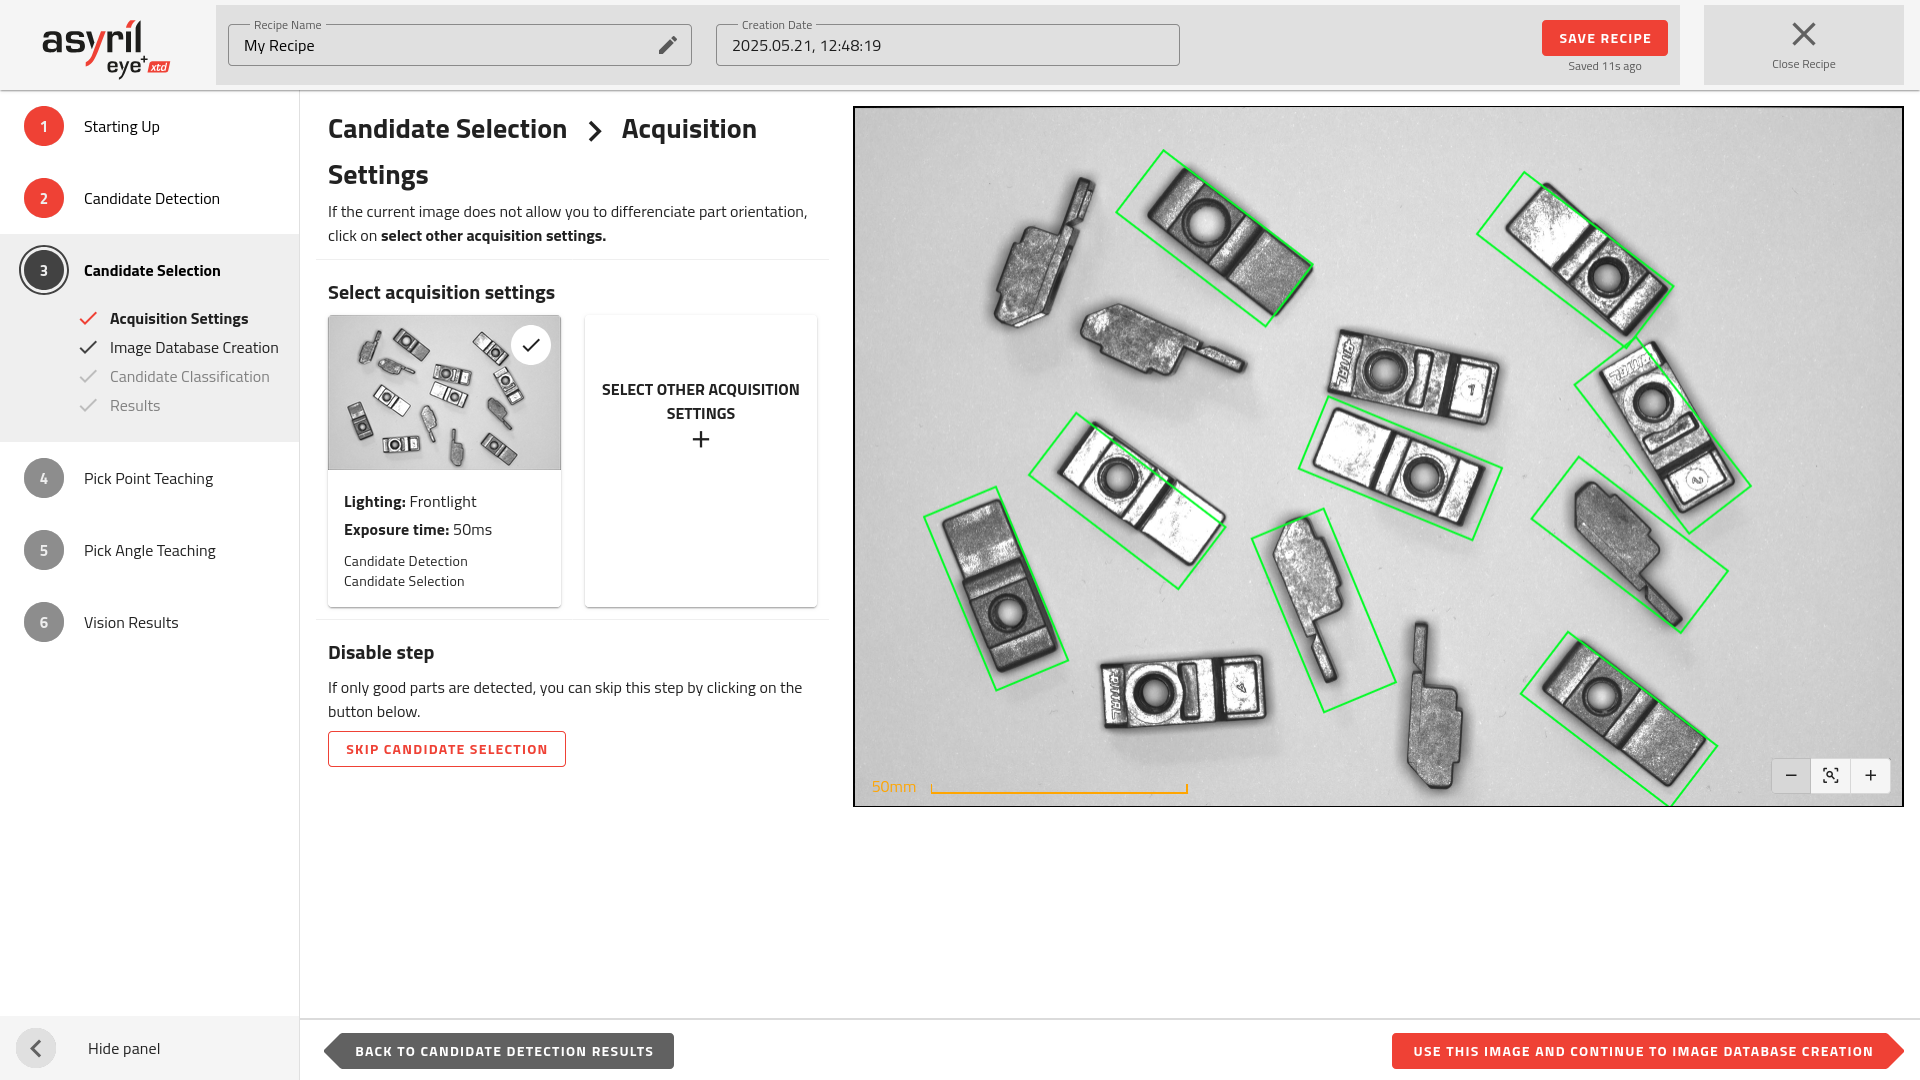
Fig. 70 Candidate Selection - Acquisition Settings
You must configure the acquisition settings to be used for Candidate Selection. By default, the settings from the previous step (Candidate Detection) are applied. If the image does not clearly indicate whether each part is a good or bad candidate, you should select alternative acquisition settings by pressing the “+” button.
Important
If you choose different acquisition settings than those used for candidate detection, this will require an additional image capture during each analysis request when EYE+ XTD is in production. The complete list of images captured for each analysis is detailed in the Image Acquisition List (Fig. 71).
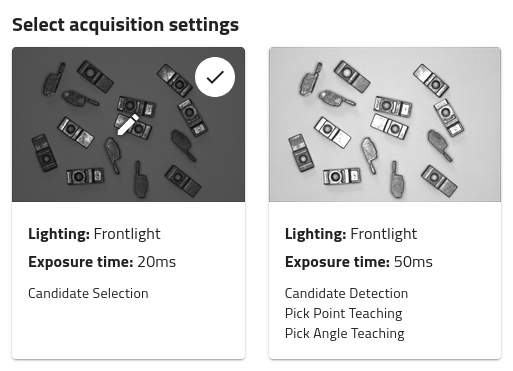
Fig. 71 List of images to be captured for one image analysis (2 images in this example)
Tip
If you only have parts in the desired orientation and want to skip this step, click on .
Frontlight
The frontlight is used when the outline does not help to make the difference between two orientations. The frontlight highlights all the features on the front face of the parts.
In Fig. 72, the difference between good or bad orientation can not be seen on a backlight image, whereas the difference is obvious in the frontlight image.
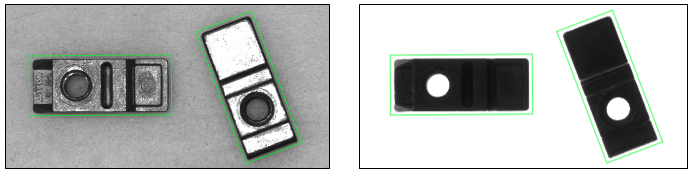
Fig. 72 Images with frontlight (left) and backlight (right)
Note
The algorithm used for the candidate selection is very sensitive to the texture in the image. For this reason it is recommended to use the frontlight for this step.
External Light
If installed, External Lighting can be used to enhance the distinction between good and bad parts. Its effectiveness depends on the type of lighting installed, as well as the material and texture of your parts.