Warning
You are reading an old version of this documentation. If you want up-to-date information, please have a look at 1.1 .3.3 Candidate Classification
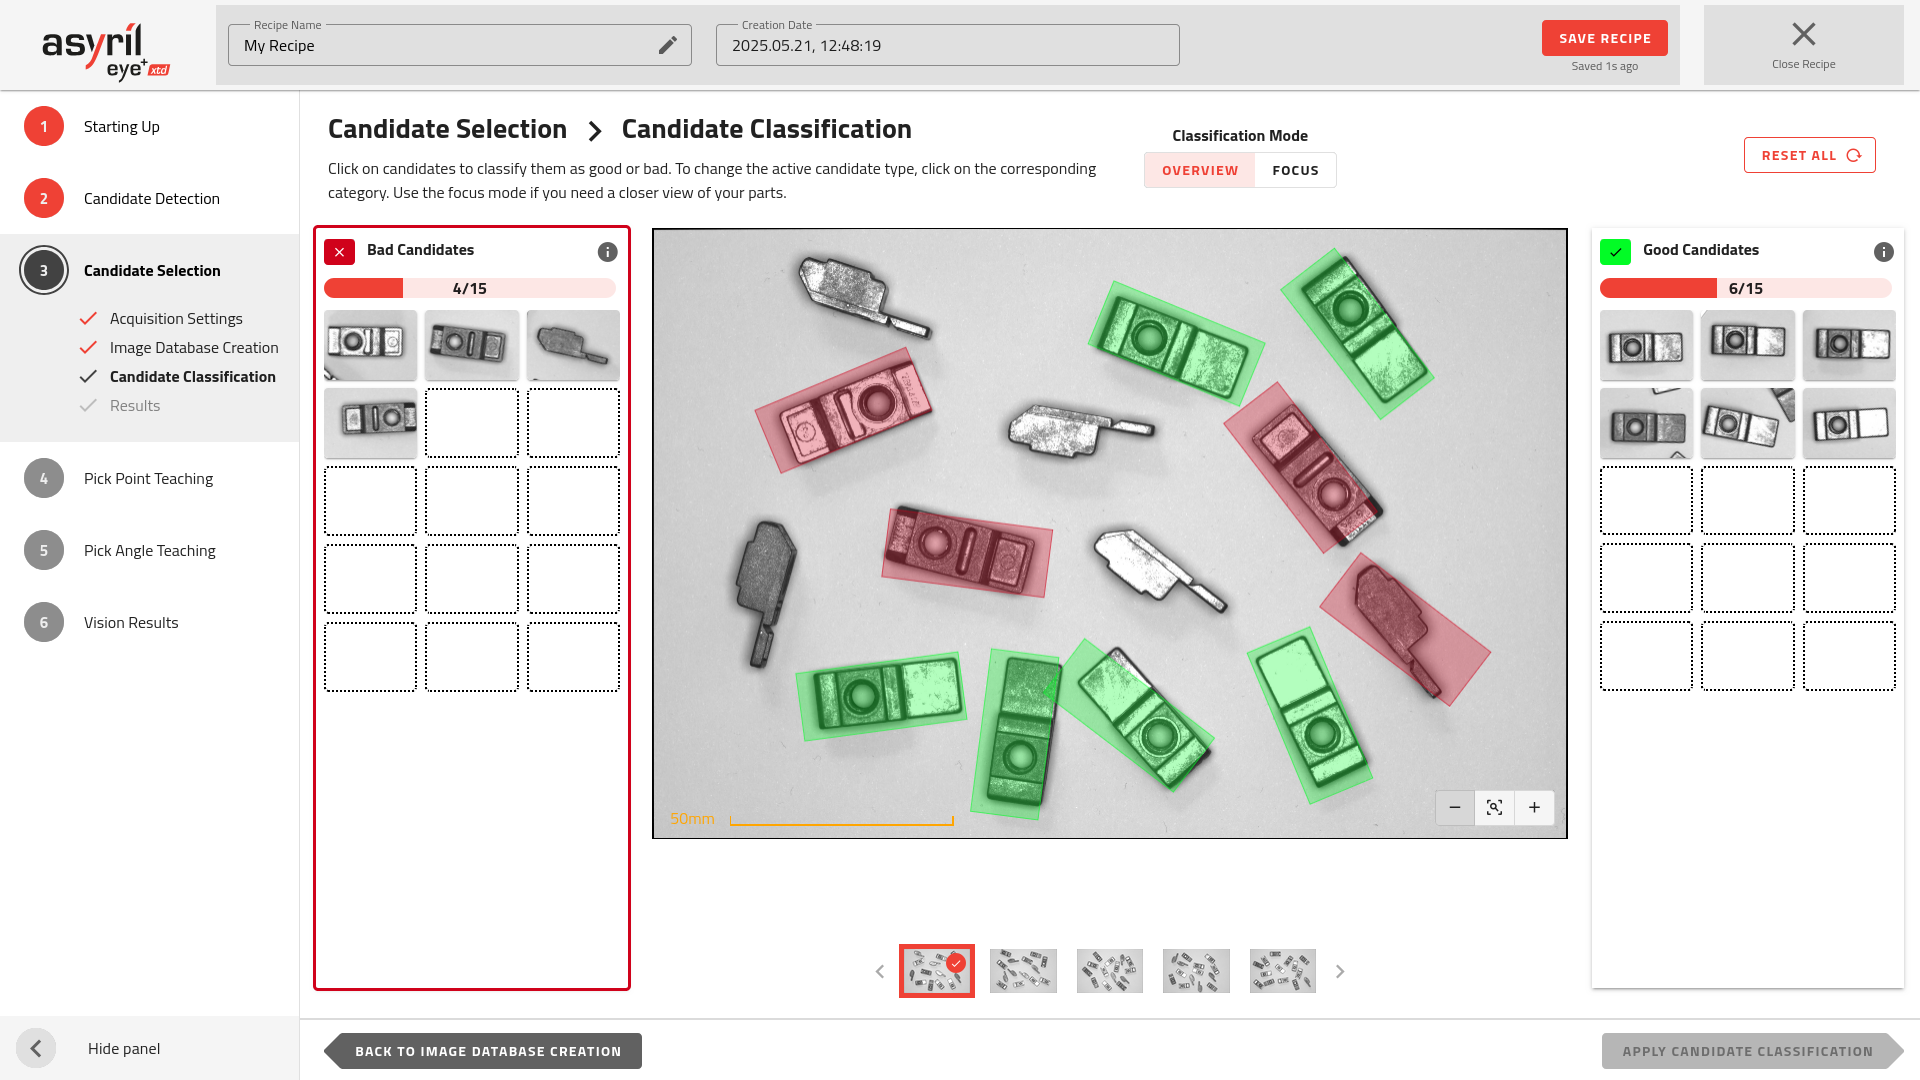
Fig. 74 Candidate Selection - Candidate Classification
Choose the profile of a good candidate
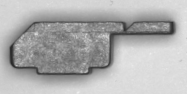
In the candidate classification stage, you have to define what is a good candidate and what is a bad candidate. A good candidate is a candidate which is well oriented for robot pick-up (Fig. 75) and bad candidates are all of the other orientations.
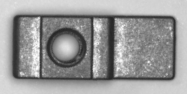
Fig. 75 Good candidate
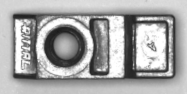
Fig. 76 Bad candidates
Once you have defined the right orientation of your part for robot pick-up, you can feed the right side of the window with all candidates that match the profile and feed the left side with the candidates that do not match.
You must place at least 15 candidates on each side.
Note
It is good practice to fill the right and left side with as much variation as possible in each good and bad category in order to increase the AI algorithm robustness.
Note
If you don’t have enough images to finish filling both sides, you can go back to the previous step and take more images.
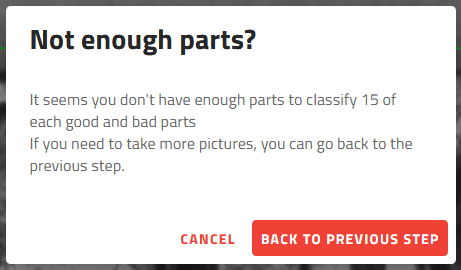
Fig. 77 Not enough parts?
Tip
You can clear the complete classification without losing the acquired images by clicking on . The classification for each part will be reset.
Classification Modes
Two modes are available for classifying good and bad parts: Overview Mode and Focus Mode. You can switch between them using the toggle at the top of the page.
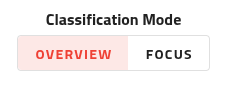
Fig. 78 Classification Mode Switch
Overview Mode
The Overview Mode is the default method for classifying parts. It displays the entire image, allowing you to quickly select good and bad parts using the mouse.
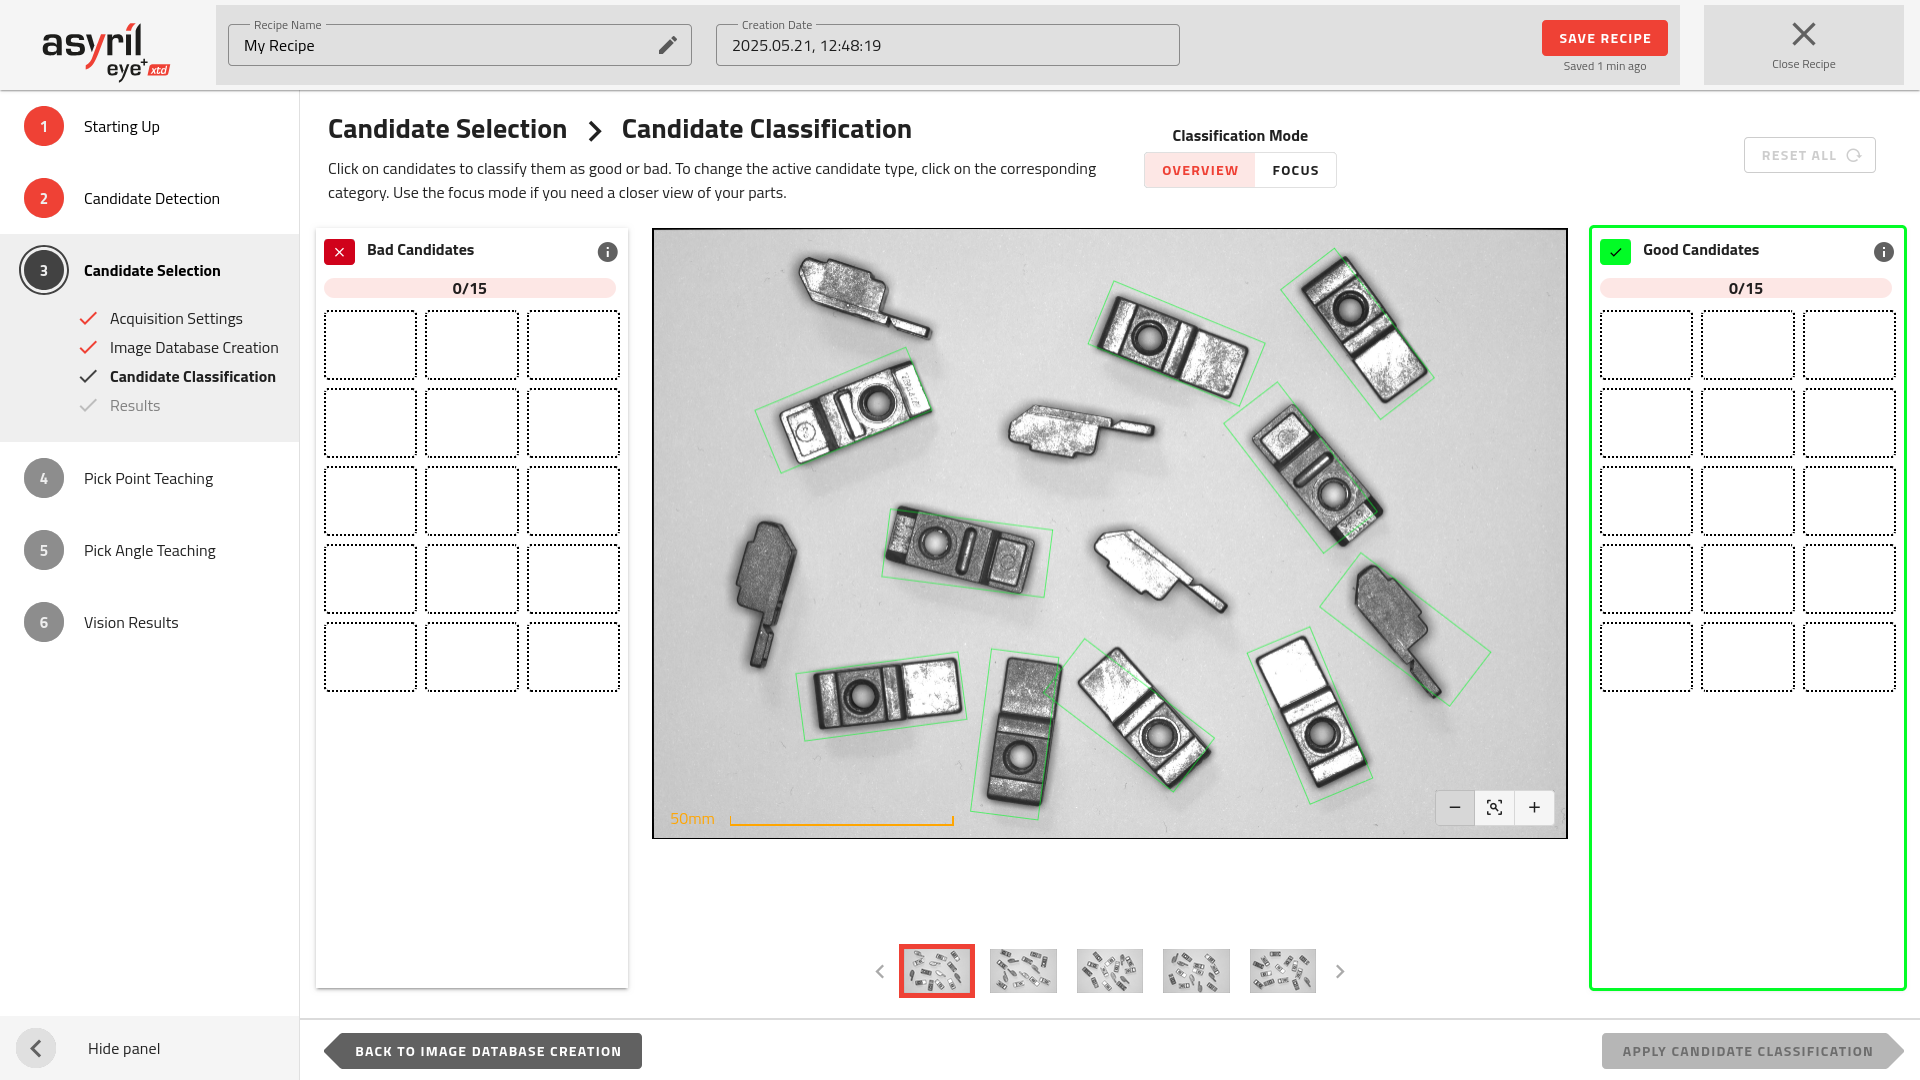
Fig. 79 Classification - Overview mode - Good Candidates selected
When this mode is enabled, one of the categories is highlighted with a colored border. You can switch categories by clicking on the other. To classify a candidate, simply click on it in the image while the desired category is selected.
Tip
You can also remove the classification of a candidate by clicking on it again on the image.
You can use the thumbnail images below to switch between images. When all the candidates in an image are classified, a checkbox will appear on the thumbnail.
Note
You do not need to classify all the parts. Once you have 15 good and 15 bad, you can apply the classification.
Important
It is not recommended to place the good parts manually on one side and the bad parts on the other to classify faster as this could result in missing orientations or lighting effects which could cause misclassifications during production.
Focus Mode
The Focus Mode provides an alternative method for classifying parts. It displays one part at a time, allowing you to closely examine its details before classification.
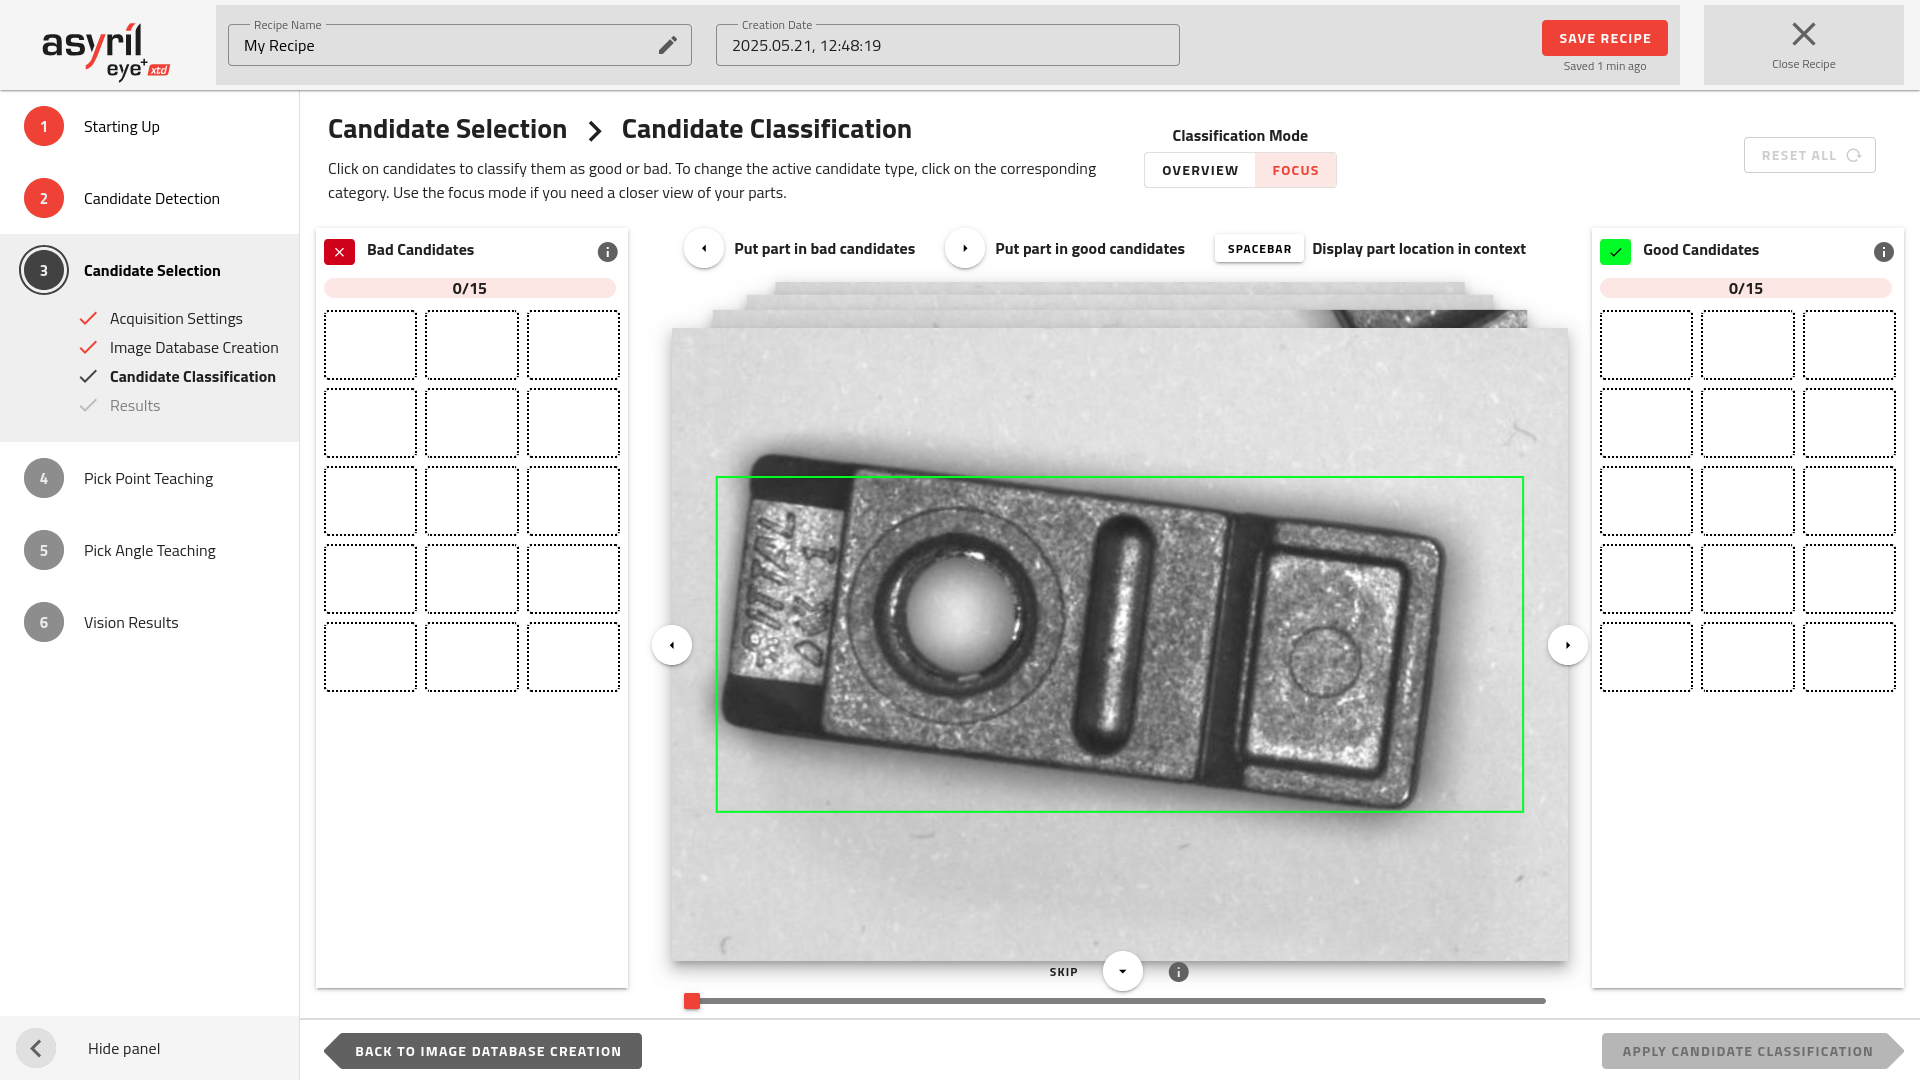
Fig. 80 Classification - Focus mode
Once you know if the part is good or bad, you can classify it using the arrows on the computer keyboard  or click on the buttons
 ![]()
![]()
![]() .
.
Tip
You can avoid classifying an image by skipping it with the ![]() button. For example, if either category
already has enough candidates and you only want add more to the other.
button. For example, if either category
already has enough candidates and you only want add more to the other.
A progress bar below the image will indicate how many images were skipped.
Apply Classification
Click to train the model based on the candidates you have provided.
By sorting the candidates into the right (good) or left (bad) categories, you are defining their orientation for the classification process. When applied, these labeled candidates are used to train a neural network, enabling EYE+ XTD to automatically distinguish between good and bad parts during production.
Multi-model
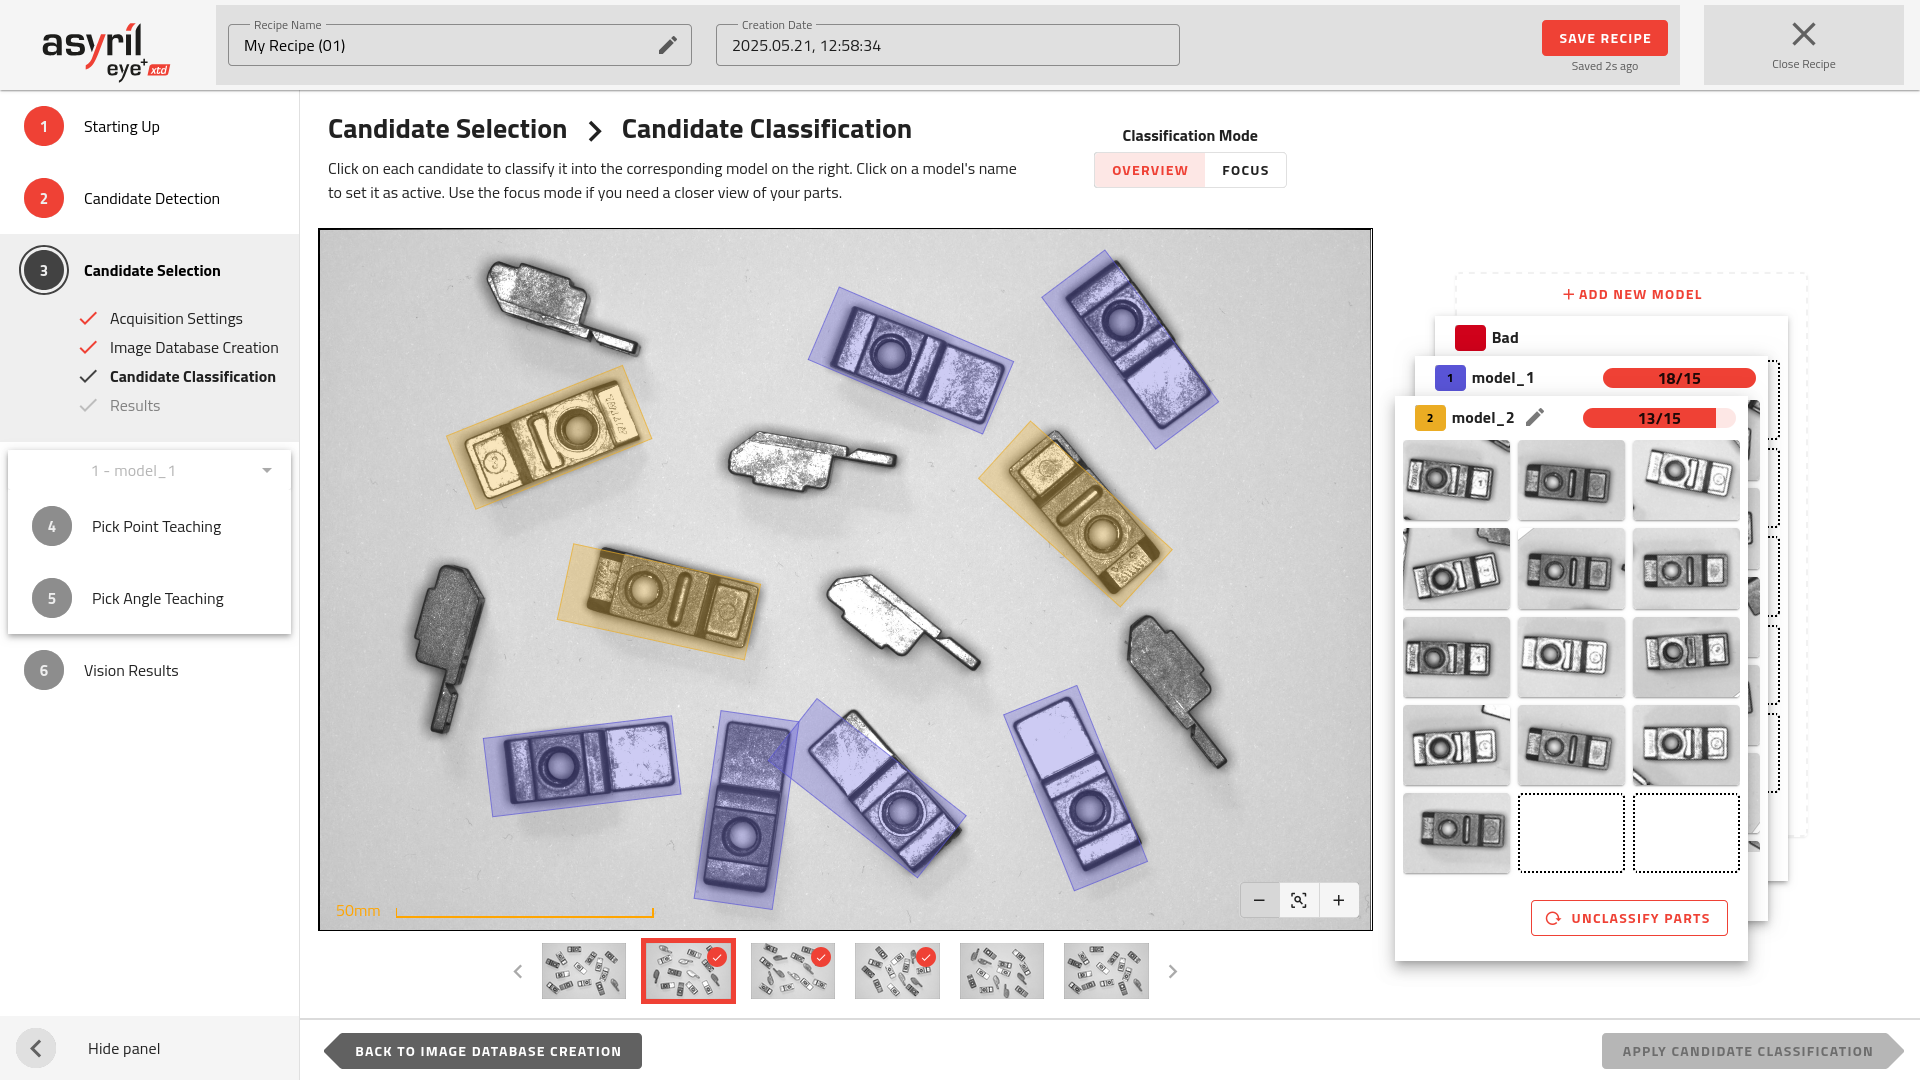
Fig. 81 Candidate Selection - Candidate Classification for multi-model
Unlike the single-model version, you do not need to classify each candidate as either OK or KO. Instead, you assign each candidate to a specific model, or place it in the BAD category if it should be rejected by the system. By default, two models are created in addition to the BAD category. The BAD category is intended for discarding incorrect orientations or unwanted parts from the detection results. No additional vision steps are required for this class.
Important
When finishing up your classification, make sure every model is visible on the plate before continuing, otherwise you won’t be able to complete your recipe successfully and the following message will be displayed
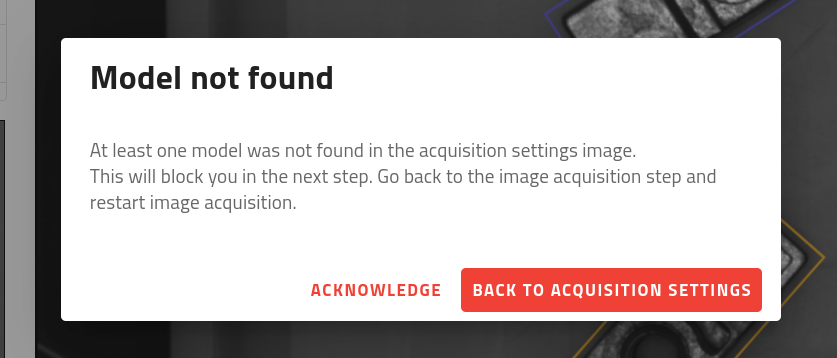
Fig. 82 Model Not Found Warning Message
Managing models
This step also provides several tools to manage your models, including the ability to:
Add a new model
Navigate between models when classifying
Rename a model
Unclassify all candidates within a model
Delete a model
All of these actions can be performed using the Model Stack located on the right side of the page.
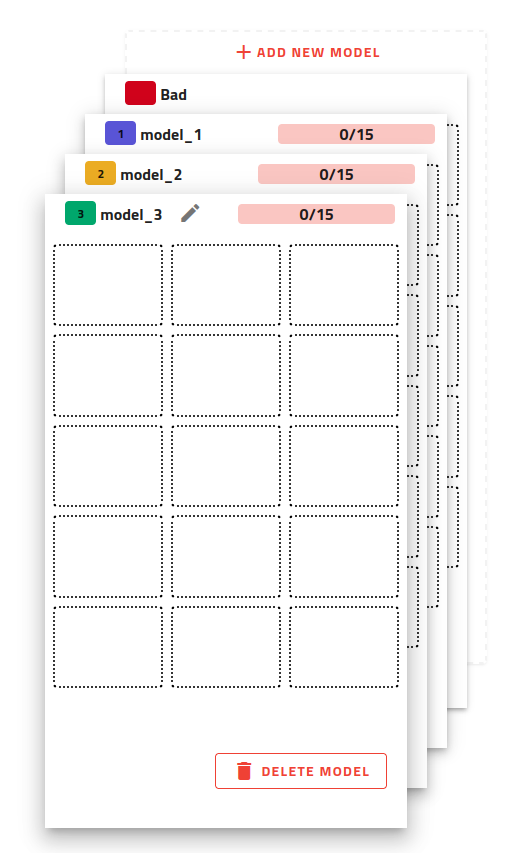
Fig. 83 Model Stack
Adding a Model Click the Add New Model button above the model stack. Once added, you can immediately name the model. Confirm your choice by clicking the checkmark or pressing the Enter key on your keyboard.
Navigating Between Models Use the UP and DOWN arrow keys on your keyboard to cycle through the models. Alternatively, you can click directly on a model card in the stack to jump to it.
Renaming a Model To rename a model, first select it, then click on its current name. Enter the new name and confirm your change.
Deleting or Resetting a Model If a model is no longer needed or needs to be reset, you can delete it using the trash icon at the bottom of the model card. This will remove the model and unassign all its candidates, making them available for classification into another model.
Note
You cannot delete a model if only two models (plus the BAD category) remain. In that case, you can only unclassify the candidates from the model, not delete it entirely.